Of course, starting a new project is the first thing we need to start with. And guess what? You can start a new project in three ways. So, let’s begin and take a look at them one by one!
(Feel free to jump to the section of your choice, directly by clicking on it)
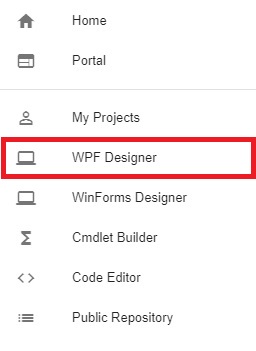
Start the project from the sidebar navigation #
Step 1. Navigate to the sidebar of your dashboard
Step 2. Select the WPF Designer option in the sidebar to create a new project
Step 3. Continue from “Selecting the form options of New Project”
Start the project while editing a form #
You can always create a new form while editing another. Here are the two simple steps:
Step 1. Navigate to the top bar of your dashboard.
Step 2. Select NEW from there to start the new project.
Step 3. Continue from “Selecting the form options of New Project”

Start the project from my project page #
- Navigate to the My Projects page.
- Select + NEW PROJECT to start the new project.
- Continue from “Selecting the form options of New Project”

Selecting the form options of New Project #
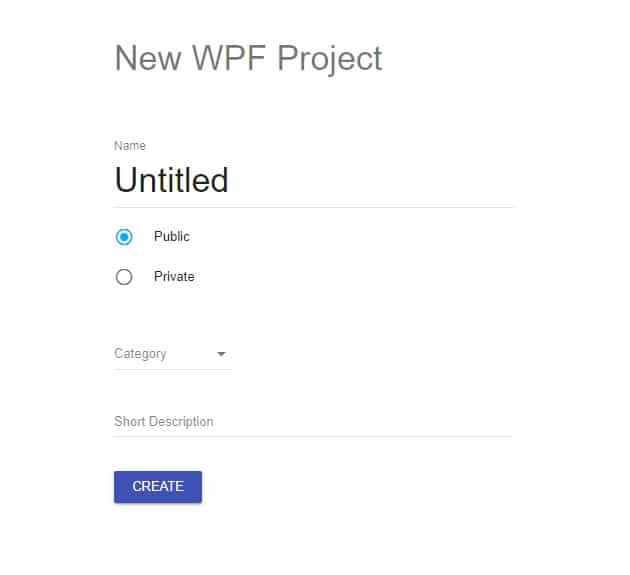
When you create a new project, you will see a form shown in the screenshot. Follow the steps below to complete the project creation process:
- Enter the name of the project in the label of Name.
- Select the appropriate option from Public and Private. Here is what each of these specifies:
- Public – It makes the particular project visible to all the users via the repository page. They will be able to download the outcome script, fork your project, and continue the work proceeding on their respective version.
- Private – It is a default selected option and specifies that your project is accessible only by you.
- Hit CREATE. And, voila, you are done!
(You have the liberty to change the name and scope of your project any time in the future.)

